Laravel Macros
I was recently working on a project where I wanted to make a classes functions available inside of the built in Laravel Str:: helper. Laravel Macros are the answer to this issue. However, I wanted to make adding additional methods an easy experience and needing to write and maintain a separate macro with argument definitions for each function was clunky.
get_class_methods
To solve this issue we can take advantage of a built in php function get_class_methods. This function returns an array of all the methods defined in a class. Perfect! Except, macros also need any arguments listed as well.
func_get_args
Enter func_get_args. This build in php function allows us to list all the arguments of a function. This is the final piece needed to dynamically macro our class.
Final Code
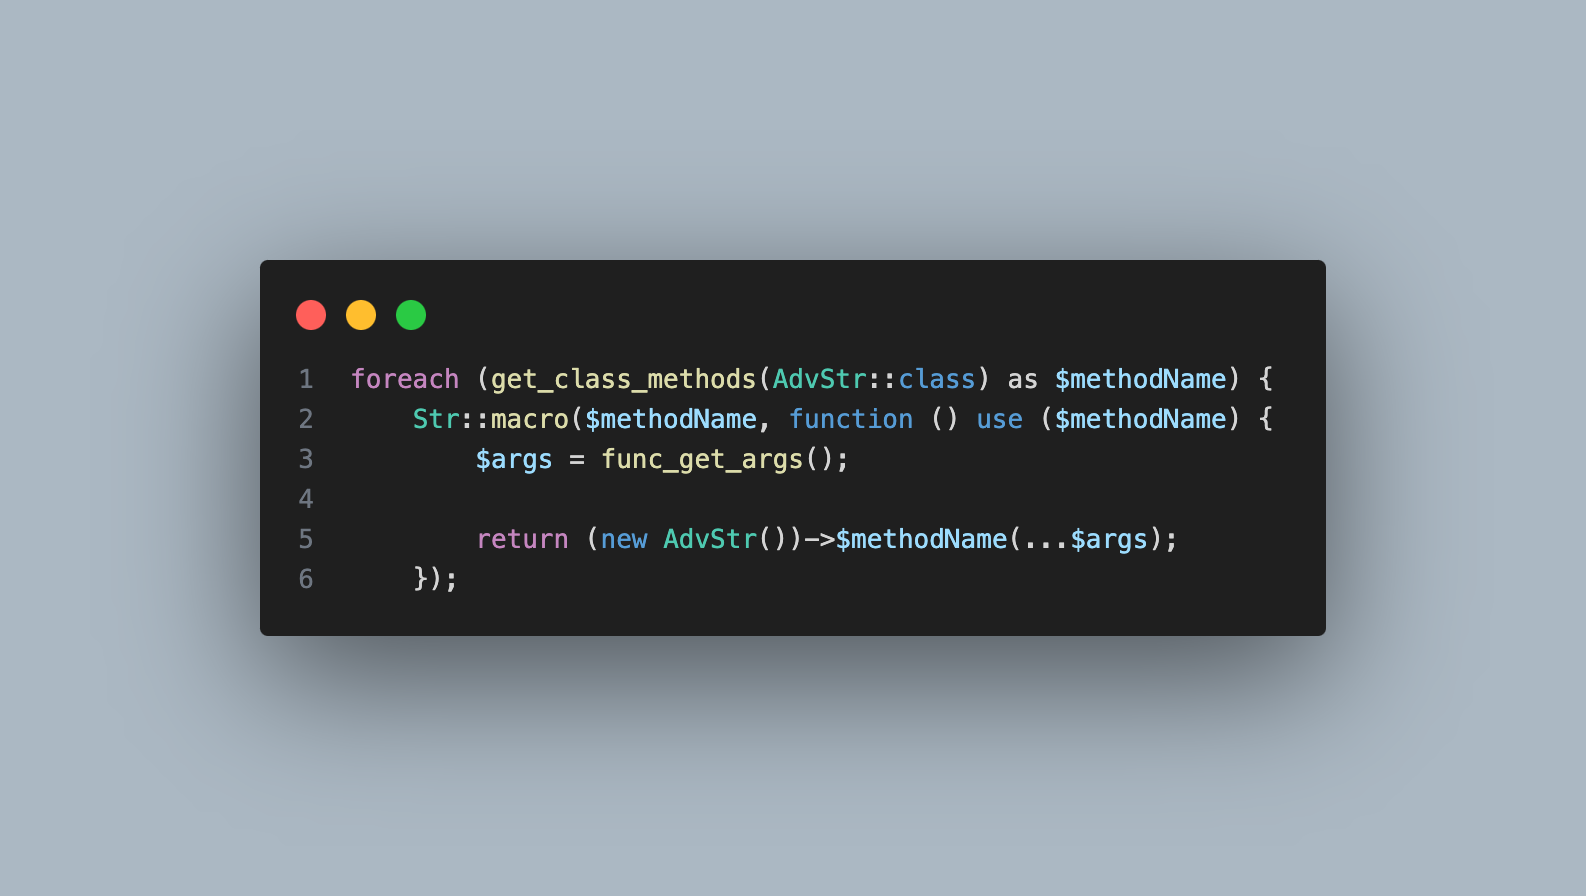
The final code looks like this:
foreach (get_class_methods(AdvStr::class) as $methodName) {
    Str::macro($methodName, function () use ($methodName) {
        $args = func_get_args();

        return (new AdvStr())->$methodName(...$args);
    });
After implementing this in a service provider you can then call your custom methods directly:
Str::myCustomFunction(myArgument: 'example');